Learn the high and wide curtain trick: where to mount the rod, how long your panels should be, and which fabrics boost natural light and perceived ceiling he...
Space Ovo
No-Drill Curtains That Make Ceilings Look Taller
Hang curtains high and wide without drilling using tension rods, twist-and-fit rods, and removable adhesive hooks. A renter-friendly guide to making small rooms feel taller, brighter, and bigger.

Maya Brooks
Maya Brooks is an interior stylist and layout enthusiast who believes square footage should never dictate your home's style. After a decade of navigating cramped city studios, she shares practical, renter-friendly decorating and storage solutions to help others maximize their tiny spaces.
Created October 17, 2026
Updated October 17, 2026
If your apartment has the classic combo of normal-height ceilings and slightly-too-small windows, curtains can either help or accidentally make everything feel shorter. The good news: you can get that “taller ceiling” look without a single drill hole. I did this for years in San Francisco and Brooklyn rentals where the walls were basically made of wishful thinking.
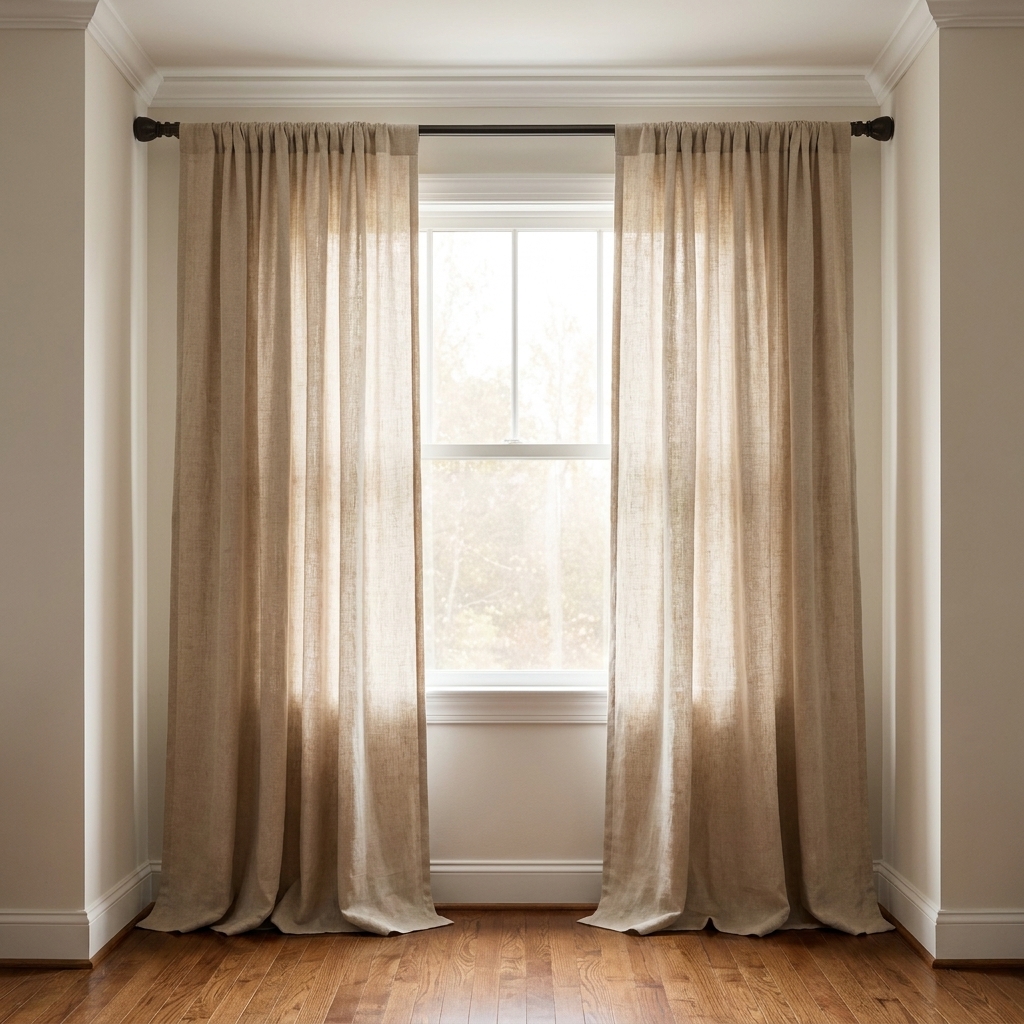
This guide walks you through three no-damage methods, plus four placement tricks that visually stretch your walls: hang them higher, hang them wider, let the fabric kiss (or nearly kiss) the floor, and use enough fullness to look intentional.
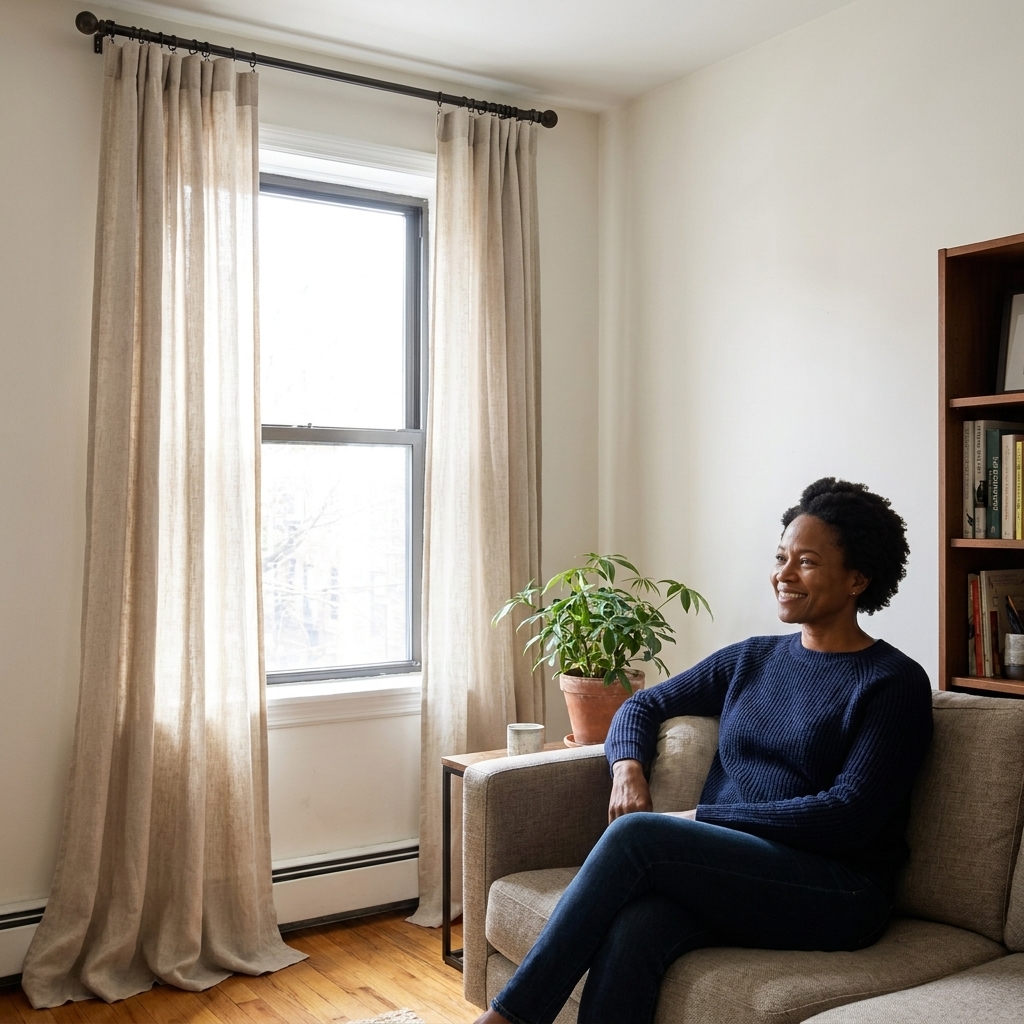
The visual trick: high, wide, long
Before we talk hardware, let’s lock in the styling rules that make ceilings look taller. Think of these as renter-friendly rules of thumb, not hard laws. Crown molding, soffits, radiator covers, and awkward trim will sometimes force a compromise.
1) Hang the rod close to the ceiling
Rule of thumb: 2 to 4 inches below the ceiling, or about halfway between the top of the window trim and the ceiling, whichever puts the rod higher. In a small room, that extra vertical line is basically free square footage for your eyeballs.
2) Go wider than the window
Rule of thumb: extend the rod 6 to 12 inches past the window on each side (if wall space allows). This makes the window look bigger and lets more glass show when the curtains are open.
3) Choose curtains that almost touch the floor
Rule of thumb: 1/2 inch above the floor for a clean look, or “kiss the floor” if you like a softer drape. Short curtains stop your eye mid-wall, which is the opposite of what we want.
4) Use enough panels for a fuller look
For most standard windows, you want two panels, even if you usually keep them open. Flat, skimpy panels can look like an afterthought. Full panels read intentional and cozy.
Quick fullness math: aim for a combined curtain width of about 1.5 to 2 times your rod length (more if you love a luxe, gathered look; less if you want a modern, flatter look).
Pick your no-drill method
There is no single best option. The “right” choice depends on your window type, the weight of your curtains, and whether you can place hardware on trim, drywall, tile, or a textured wall that hates adhesive.
Quick safety and damage note: avoid hanging anything where it could interfere with sprinklers, vents, or smoke detectors. Keep fabric away from heaters and radiators. And if you have wallpaper, flaky paint, or freshly painted walls, skip adhesive. Many paints need weeks to fully cure, and removable strips can still pull up weak paint.
Option A: Tension rod inside the window frame
This is the fastest, least scary solution. A tension rod wedges between the inside edges of your window frame. No holes, no adhesive, no drama.
- Best for: lightweight curtains, café curtains, sheers, privacy liners, kitchens and bathrooms.
- Not ideal for: heavy blackout curtains (they can slowly slide down, especially if you tug them open daily).
- Works with: recessed window frames that have a solid, flat surface. Vinyl and painted wood are usually fine. Metal can be slippery, so look for grippy end pads.
How to make it look taller: a tension rod inside the frame does not automatically add height. To get the tall-ceiling effect, use it as a layer: add a tension rod for sheers or a liner inside the frame, then use another no-drill method (below) to hang decorative drapes higher and wider outside the frame.
Option B: Twist-and-fit rod between two walls
Twist-and-fit rods are basically tension rods with more structure. They often have a thicker diameter, sturdier internal tension, and larger end pads, which can translate to less sag and a higher stated load rating. Check the packaging, because not all rods are created equal.
Important: this option only works when your window sits between two perpendicular walls or inside a nook or alcove. If your window is on one long, flat wall with no side returns to brace against, this will not be your hero.
- Best for: spanning between two side walls around a window, or across an alcove.
- Not ideal for: very wide spans with no side walls, crumbly plaster, or glossy tile where the end cap can slip.
- Works with: medium-weight curtains if the rod is high quality and the walls are solid.
Pro tip: if your window is on a wall that ends near a corner, you can often place a twist-and-fit rod close to the ceiling between the two perpendicular walls. This is one of my favorite renter hacks because it creates that “custom drapery wall” look with zero hardware in the drywall.
Option C: Command hooks plus a lightweight rod
If you want that true high-and-wide placement above the window, removable adhesive hooks can do it, as long as you respect manufacturer limits and prep correctly.
Reality check: adhesive hooks are usually rated for a straight downward load, not the side-to-side tugging you do when you open and close curtains. Translation: even if your hooks are rated for a certain weight, pulling fabric can still stress them. Lighter curtains and gentle handling matter.
- Best for: light to medium fabrics, sheers, linen-look panels, and rooms where you want the rod above the trim.
- Not ideal for: very heavy blackout curtains (especially multi-layer, velvet-style panels) unless you use multiple supports and a very light rod.
- Works with: smooth, clean surfaces. Painted walls can work, but old, chalky, dusty, or peeling paint is risky. Textured walls (heavy orange peel) can reduce hold. Avoid wallpaper.
What “light to medium” means (rule of thumb): aim to keep the total weight low and well under your hook rating, and add extra supports for wider windows. If you are not sure what your curtains weigh, assume they weigh more than you think and choose another method.
Hook style to look for: hooks with a wide cradle (or curtain rod holders) that fit your rod diameter. If your rod is too thick, it can pop out when you open the curtains.
Rod tip: pick a thin metal rod that stays straight under your curtain weight. In no-drill setups, a lighter rod is usually stronger than a heavier, bendy one.
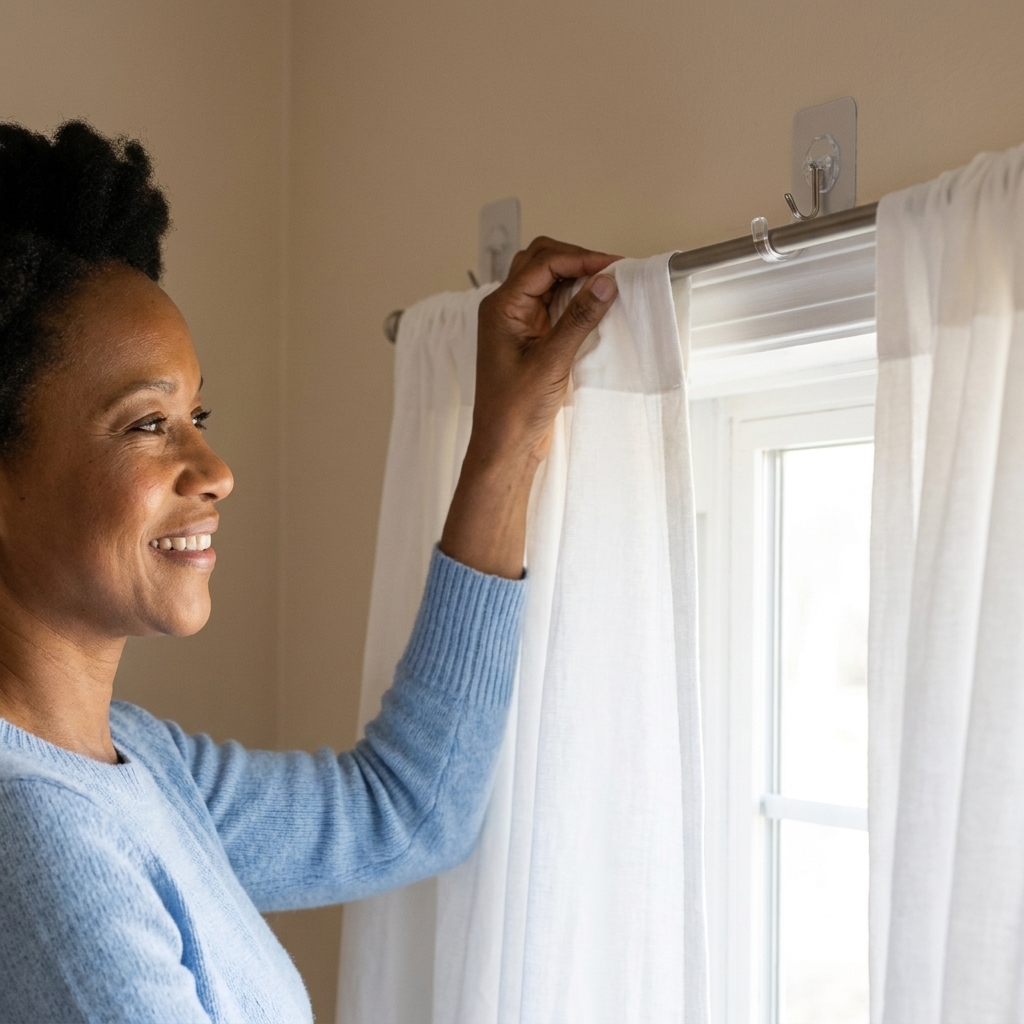
Measuring cheat sheet
I am begging you, measure first. Nothing eats your weekend like rehanging curtains because you guessed “about there.”
Step 1: Decide your curtain length
- Floor length: measure from your planned rod height down to 1/2 inch above the floor.
- Rod-to-floor reality check: if you place the rod near the ceiling, you will likely need 96-inch or 108-inch panels, depending on your ceiling height.
Step 2: Decide how wide your rod should be
- Minimum: window width plus 12 inches total (6 inches each side).
- More dramatic and airy: window width plus 24 inches total (12 inches each side).
Step 3: Check rod and hook limits
Read the packaging and be honest about your fabric. A single velvet blackout panel can weigh more than two breezy cotton panels. If you are using adhesive hooks, remember you are dealing with real life forces, not just a static weight.
Command hooks step-by-step
This is the method most renters want because it gives the biggest “taller ceiling” payoff.
What you need
- Removable adhesive hooks or curtain rod holders rated for the load you plan to hang
- A lightweight metal rod with minimal sag
- Rubbing alcohol and a lint-free cloth
- Measuring tape and pencil
- Optional: extra hooks for center support on wider windows
Step 1: Clean the wall like it matters
Wipe the hook spots with rubbing alcohol and let dry fully. Dust and residue are why hooks fail, not bad luck.
Step 2: Mark your placement
- Mark the height: 2 to 4 inches below the ceiling is the sweet spot.
- Mark the width: 6 to 12 inches past the window on each side.
- Use a level if you have one. If you do not, measure from the ceiling down on both sides so your marks match.
Step 3: Apply hooks and wait
Press firmly for the recommended time, then let the adhesive cure for the full time listed on the package before you hang anything. Waiting is annoying, but it is cheaper than repairing paint.
Step 4: Hang the rod, then the curtains
Put the rod in the hooks first, then add panels. Open and close them gently a few times. If anything shifts, add a center support hook for wide spans, reduce the curtain weight, or switch to rings that glide more easily so you are not yanking fabric.
Step 5: Train the folds
If you want that “styled” drape, arrange the pleats by hand and loosely tie with a scarf or ribbon overnight.
This works best on cotton and linen blends. Slippery synthetics sometimes need steaming, curtain weights, or clip rings to behave.
Twist-and-fit rod near the ceiling
This one is great when you have two side walls you can brace between, like a window on a short wall section or a nook.
Step-by-step
- Measure the span between the two walls where the rod will press.
- Set height close to the ceiling, keeping it level on both sides.
- Twist to tighten until secure. Do not overtighten on fragile plaster.
- Add panels and test by sliding them. If the rod creeps, tighten slightly, add grippier end pads if your rod supports them, or switch to lighter rings.
Small-space styling bonus: if your window is off-center, a twist-and-fit rod can still look intentional because the “curtain wall” becomes the feature, not the window placement.
Tension rods for layering
Even if you are going for high drama drapes, tension rods are amazing as a stealth helper.
Two easy layer combos
- Sheer inside plus drape outside: tension rod inside the frame for privacy, Command hooks or twist-and-fit rod above for the tall look.
- Blackout inside plus decorative outside: tension rod holds a blackout liner close to the glass, while your “pretty” curtains stay lighter and easier on the wall hooks.
Layering is also a tiny-apartment win because it lets you keep privacy without living in a cave.
Blackout expectations: without drilling, you may get a little light gap at the sides. For maximum darkness, inside-mount blackout shades or a snug liner inside the frame usually outperform outside-mount drapes hung with adhesive.
Fabric choices that add height
The goal is vertical flow, not visual clutter.
- Solid or subtle textures: linen-look, cotton, or soft woven fabrics read airy and calm.
- Vertical stripe (thin and quiet): an instant height booster, especially in bedrooms.
- Match curtain color to wall color: low contrast makes walls feel taller and more continuous.
- Go lighter for low ceilings: dark heavy panels can feel like they are pressing down, unless the room has a lot of light and you love the moody look.
Common renter mistakes
Hanging the rod on the window trim
This is the most common reason curtains make ceilings look shorter. Take the rod up toward the ceiling and let the fabric create a tall column.
Using curtains that are too short
If you already own 84-inch panels, you can sometimes cheat by raising your hem with iron-on tape and making them look intentional, but in most cases, longer panels are the easier win.
Overloading adhesive hooks
If you want heavy blackout curtains, use a lighter rod, add extra supports, and open and close them gently. Or layer: keep the heaviest part supported inside the frame by tension and let the outside panels be decorative.
Skipping wall prep and cure time
Clean walls, fully cured adhesive, and slow removal are how you keep your security deposit intact.
FAQ
Will removable hooks pull off paint?
They can if the paint is old, poorly bonded, dusty, or removed too fast. Clean first, follow cure times, and remove by slowly stretching the adhesive strip straight down. If your wall paint is already peeling in places, use a twist-and-fit rod between walls or stick to tension rods inside the frame.
Can I hang blackout curtains without drilling?
Yes, but be strategic. Use a lightweight rod, multiple supports, or layer blackout liners on a tension rod inside the frame and keep your outer curtains lighter. True heavy blackout velvet is where no-drill setups struggle, and no-drill wraparound rods are tough to pull off.
What if my window is right next to a corner?
You can still go high-and-wide, but you may only be able to extend wide on one side. In that case, extend as much as you can, then use a holdback on the tight side to keep the panel pulled back and tidy.
How do I make curtains look custom in a rental?
Hang them high, use enough width for fullness, steam out wrinkles, and keep the rod finish simple. Matte black, brushed nickel, or warm brass instantly reads more intentional than shiny, bendy rods.
My tiny apartment formula
If you want the simplest, most reliable setup that still gives you the tall-ceiling magic:
- Height: 2 to 4 inches below the ceiling
- Width: 6 to 12 inches past the window on both sides
- Fullness: total panel width about 1.5 to 2 times the rod length
- Panels: two full-length panels (often 96 inches in many apartments)
- Hardware: removable hooks with a lightweight rod, plus a tension rod inside the frame if you need extra privacy
It is renter-friendly, small-space smart, and it makes a room feel like it can finally exhale.