Where to hang mirrors, what they should reflect, and how to angle them to multiply light and create real-looking depth in a small studio.
Space Ovo
Hang Curtains High and Wide in a Small Apartment
A step-by-step, renter-friendly guide to the “high and wide” curtain method that makes windows look bigger, ceilings feel taller, and rooms brighter without blocking natural light.

Maya Brooks
Maya Brooks is an interior stylist and layout enthusiast who believes square footage should never dictate your home's style. After a decade of navigating cramped city studios, she shares practical, renter-friendly decorating and storage solutions to help others maximize their tiny spaces.
Created October 17, 2026
Updated October 17, 2026
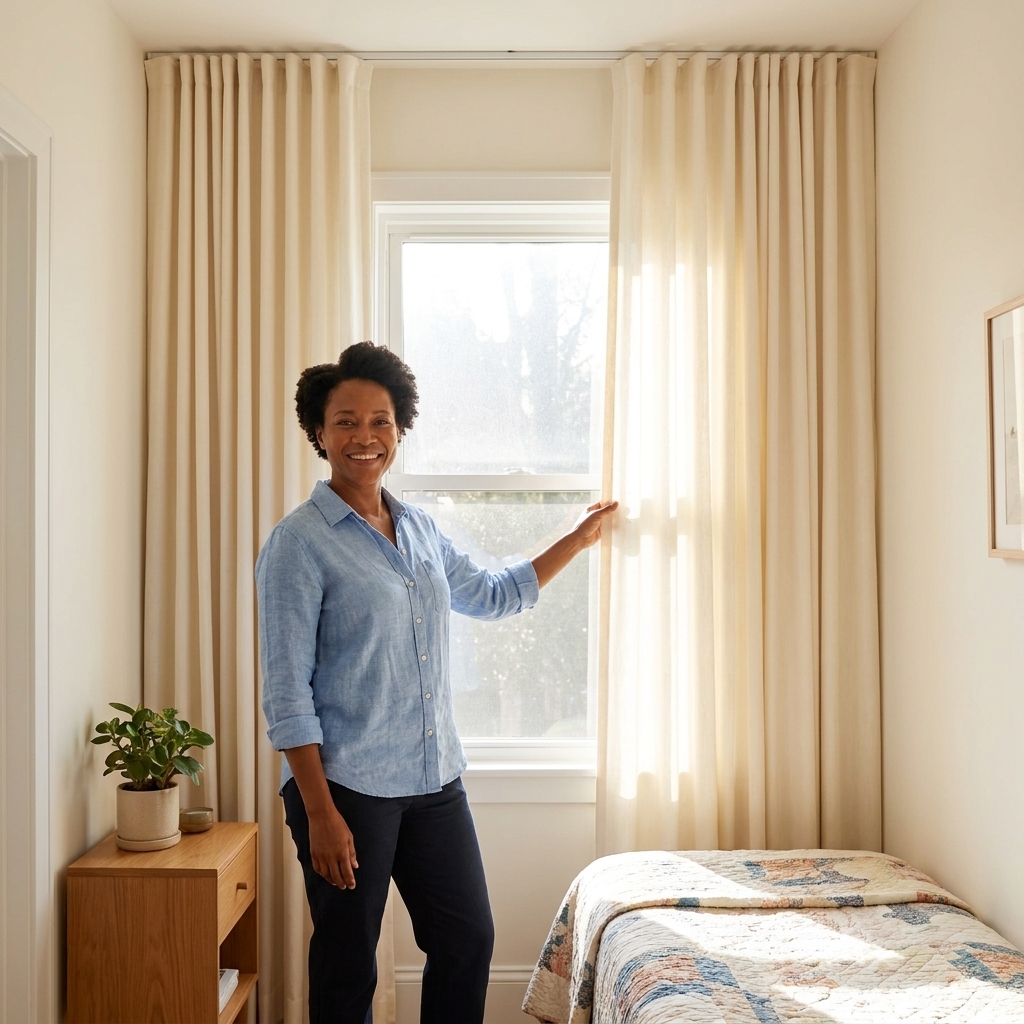
If you live in a small apartment, your windows are basically your emotional support square footage. The goal with curtains is not just “privacy.” It is more light, more height, more breathing room. That is exactly what the high and wide method does: you mount the rod closer to the ceiling and extend it past the window so the glass looks larger and the room feels taller.
I learned this the hard way in a 350-square-foot studio where my one window had to do the heavy lifting for the whole space. The right curtain placement made it feel like I renovated. Spoiler: I did not. I just used a measuring tape like it was my job.

What “high and wide” means
Instead of mounting a curtain rod right above the window trim (the common default), you:
- Hang it high: place the rod just below the ceiling or crown molding, or at least several inches above the top of the window.
- Hang it wide: extend the rod past the left and right sides of the window so the curtain panels can rest mostly on the wall, not over the glass.
This creates two small-space miracles:
- Taller ceilings: your eye reads the curtain line as the room’s height.
- More light: when curtains stack on the wall, more of the window stays uncovered during the day.
Before you start
Tools
- Measuring tape
- Pencil
- Level (or a phone level app)
- Stud finder (helpful, not mandatory)
- Drill and drill bits
- Step stool
Materials
- 1 curtain rod (choose a diameter and material that can handle your curtain weight)
- 2 brackets (3 if your rod is long or your curtains are heavy)
- Anchors (if you are not drilling into studs)
- Curtain rings or grommet-top panels
- 2 curtain panels (usually one panel per side looks best)
Renter note: If you cannot drill, jump to the no-drill options below. You can often still get a “high” look with adhesive brackets or a ceiling track. Tension rods are great in a recess, but they usually cannot do the full high-and-wide effect.
How to hang them
Step 1: Pick your height
Pick the highest height that still looks visually intentional for your wall.
- Best in most rooms: 1 to 3 inches below the ceiling or crown molding.
- Also great: halfway between the top of the window trim and the ceiling if that gap is very tall and you want it to look balanced.
- Minimum: about 6 to 8 inches above the window trim if you have limited space.
In tiny rooms, higher is usually better because it lengthens the wall visually, but do not fight a smoke detector, a soffit, or a weird ceiling bump. Work with what you have.
Step 2: Measure how wide to go
This is the part that buys you daylight. Extend the rod beyond the window so the panels can sit off the glass when open.
- Rule of thumb: extend the rod 8 to 12 inches past each side of the window.
- If you have the wall space: go 12 to 16 inches per side for a luxe, wide-window effect.
- If a side is tight (corner, cabinet, closet): extend as far as you can on the open side and use a return bracket (a bracket that lets the rod end meet the wall) or plan for a tighter stack on the constrained side.
When in doubt, mock it up with painter’s tape. I do this even now because my brain loves to lie to me about measurements.
Step 3: Choose the right length
For maximum ceiling height, you want the curtain to land cleanly.
- Best for a crisp look: panels that kiss the floor, meaning they hover barely off it (about 1/4 to 1/2 inch).
- Best for hiding uneven floors: a slight break (about 1/2 to 1 inch of fabric on the floor).
- Often awkward in small rooms: “high-water” curtains that stop at the sill, unless it is a kitchen sink situation.
Quick measuring tip: measure from where the rod will sit (or from the bottom of rings, if you are using rings) down to the floor. That number is your target length.
Heat and air note: If you have a radiator, baseboard heater, or an AC unit under the window, leave clearance so fabric is not resting on a heat source or getting sucked into airflow. In those cases, a tailored hover above the unit can still look intentional.
Step 4: Mark bracket placement
Hold the rod up at your chosen height and width, then mark where brackets will go.
- Place each bracket so it supports the rod near the ends, but leave enough room for finials if your rod has them.
- If your rod is long or your curtains are heavy, add a center support bracket so the rod does not sag. When in doubt, check the rod manufacturer’s guidance for max span and bracket spacing.
Use a level. Your eyes will not catch a slight tilt until the curtains are up, and then you will never unsee it.
Step 5: Drill, anchor, mount
- If you hit a stud, screw directly into it.
- If you do not hit a stud, use the correct wall anchor for your wall type and curtain weight.
- Tighten everything so brackets do not wobble.
Rental reality check: if you have to rely on anchors, keep your fabric and hardware reasonably lightweight. Save blackout velvet plus industrial rods for walls you are allowed to truly commit to.
Step 6: Hang panels and set the stack back
Once the rod is up, hang the curtains and pull them open. You want most of the bulk resting on the wall, not covering the window.
- Goal: when open, you should see as much glass as possible.
- Fix a too-narrow rod: swap in a longer rod or use an add-on extender if your hardware allows.
- Fix uneven length: use iron-on hem tape or clip rings to cheat the height slightly.
Fabric that keeps light
Curtain placement is the main trick. Fabric is the supporting actor that makes the light feel soft, not blocked.
Best for small apartments
- Linen or linen-look sheers: airy and flattering, great for daytime.
- Light-filtering panels: gives privacy without turning your room into a cave.
- Cotton voile: a budget-friendly sheer that still feels polished.
If you need darkness
Layering is your friend:
- Hang a sheer layer for daytime brightness.
- Add blackout panels on the same rod (double rod) or on a separate rod, still mounted high and wide.
Bonus apartment combo: If you want nighttime privacy without heavy drapes, pair high-and-wide curtains with a simple roller shade or cellular shade inside the frame.
Color tip: In small rooms, curtains that are close to your wall color read as calmer and taller. High contrast can look amazing, but it will visually frame the window more strongly.
How wide should panels be?
This is where a lot of people accidentally end up with sad, flat curtains that look like a bedsheet in distress.
- For a full look: total curtain width is often about 2x the rod width.
- For a tailored look: 1.5x can be enough, especially with stiffer fabrics or grommet-top panels.
- For sheers you want to look luxe: closer to 2.5x can be dreamy.
Example: If your rod spans 80 inches, you want roughly 120 to 160 inches of curtain width total, depending on how full you want them to look.
No-drill options
If your lease or your walls are fragile, you still have options. The key is picking methods that can handle the weight of fabric, and being realistic about what they can and cannot do.
Tension rods
- Works in a window recess or between two walls.
- Choose lightweight curtains and keep it high inside the frame.
- Tradeoff: you will not get the full “wide” effect unless the rod spans wall-to-wall.
Adhesive rod brackets
- Look for heavy-duty versions rated for the actual weight you plan to hang.
- Use sheers or very light-filtering panels.
- Clean the wall with rubbing alcohol first for best adhesion.
Ceiling tracks (ask first)
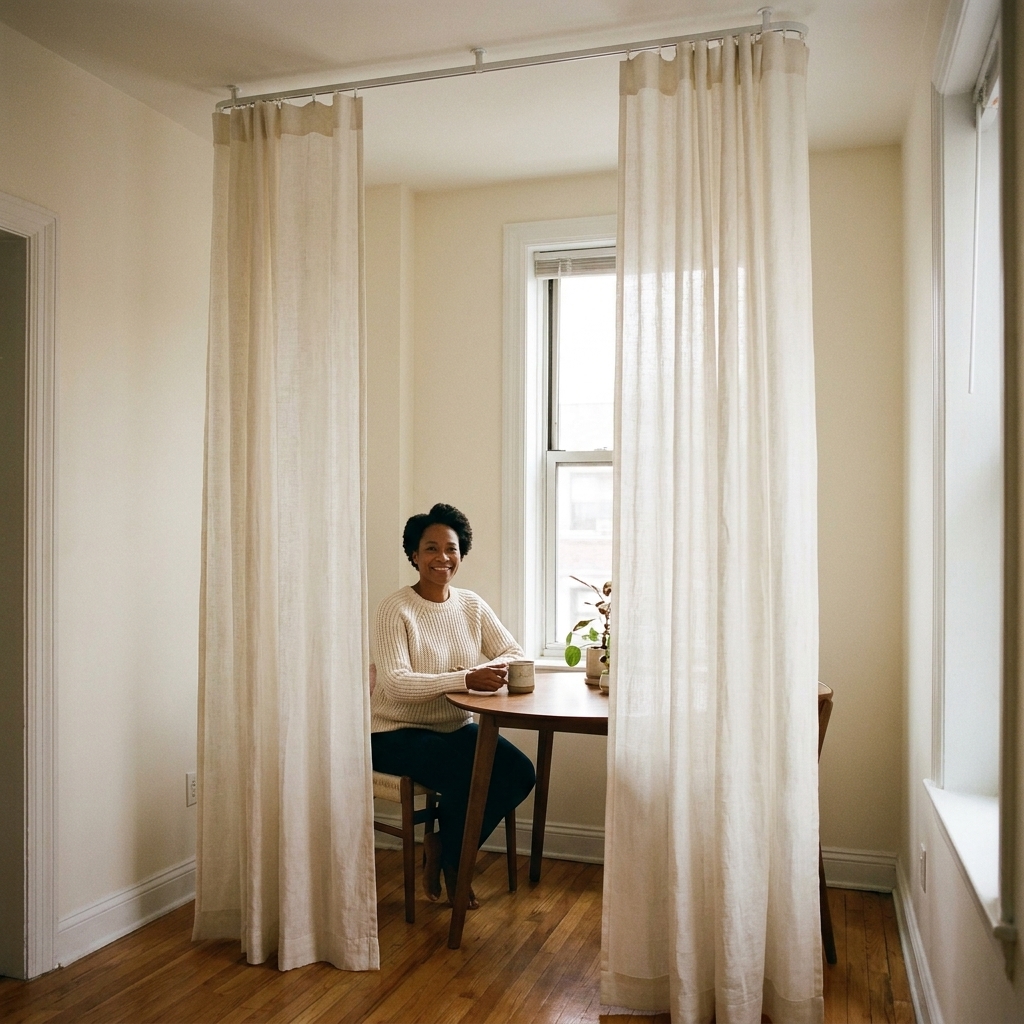
If your landlord allows small holes, a simple ceiling track can look sleek and make ceilings feel even taller because the curtain starts at the top plane of the room. It is also great for tricky layouts and wide spans.
Styling tweaks
Use rings
Clip rings or ring hooks help curtains slide smoothly, which means you will actually open them daily and get that natural light.
Steam panels
Wrinkles make curtains look temporary. A quick steam makes them look tailored, even if they were budget-friendly.
Train the folds
If you want that designer ripple, gently fold the curtains into pleats and tie them loosely for a day or two. Fabric has memory, just like we do.
Keep the hem livable
In a small room, visual clutter reads loud. If your curtains puddle and you are constantly stepping on them, you will start hating them. A clean hem feels calm.
Common mistakes
- Mistake: Rod mounted right above the trim.
Fix: Move it up. Even 6 inches higher can change the whole room. - Mistake: Rod only as wide as the window.
Fix: Replace with a longer rod and let curtains stack on the wall. - Mistake: Curtains too short.
Fix: Add clip rings to gain an extra 1 to 2 inches, or use hem tape to adjust length. - Mistake: Heavy fabric in a dim room.
Fix: Swap to light-filtering panels or add sheers for daytime. - Mistake: Not enough curtain width.
Fix: Add a second set of panels for fullness.
Cheat sheet
- Mount height: often 1 to 3 inches below ceiling (or at least 6 to 8 inches above trim)
- Mount width: often extend 8 to 12 inches past each side (more if you can)
- Length: kiss the floor for maximum height, unless heat or AC makes that impractical
- Fabric: sheers or light-filtering for bright rooms, layered with blackout if needed
- Fullness: total curtain width often about 2x rod width (1.5x to 2.5x depending on fabric and header)
FAQ
Should curtains touch the ceiling?
You do not need them to touch the ceiling, but getting the rod within a couple inches of it creates the same visual lift. If you are using a ceiling track, then yes, they can start at the ceiling for a super tall look.
What if my window is next to a wall?
Go wide on the side that has space, and keep the tight side as close as possible without the curtain rubbing constantly. A ceiling track can also help because it is easier to span odd layouts.
Do high curtains make the room darker?
Not if you also go wide. The whole magic is that the curtains can live on the wall during the day, leaving the glass uncovered.