The small-space traffic flow fix: walkway width guidelines, key clearances, and renter-friendly layout tweaks that stop the daily shuffle and make a tight ap...
Space Ovo
Fit a Fold-Out Sewing Table Without Blocking the Room
Plan a fold-out sewing table that opens fully without trapping you in. Measure the real footprint, chair slide, fabric overhang, cords, and lighting. Tape it out and test your walk paths before you buy.
Maya Brooks
Maya Brooks is an interior stylist and layout enthusiast who believes square footage should never dictate your home's style. After a decade of navigating cramped city studios, she shares practical, renter-friendly decorating and storage solutions to help others maximize their tiny spaces.
Created October 18, 2026
Updated October 18, 2026
If you have ever opened a fold-out sewing table and immediately thought, cool, now I live behind it, you are not alone. Sewing tables are sneaky: the closed footprint looks totally reasonable, then the leaf swings out, your chair needs space, and suddenly the room is a maze made of furniture corners and power cords.
The fix isn't magic. It's measuring the operating setup like you'd measure a mini workshop: table open, chair pulled out, fabric draped, cord plugged in, light turned on. Once you plan for that real footprint, it's much easier to fit a fold-out table without blocking your room or your exits.
Step 1: Measure the real open footprint
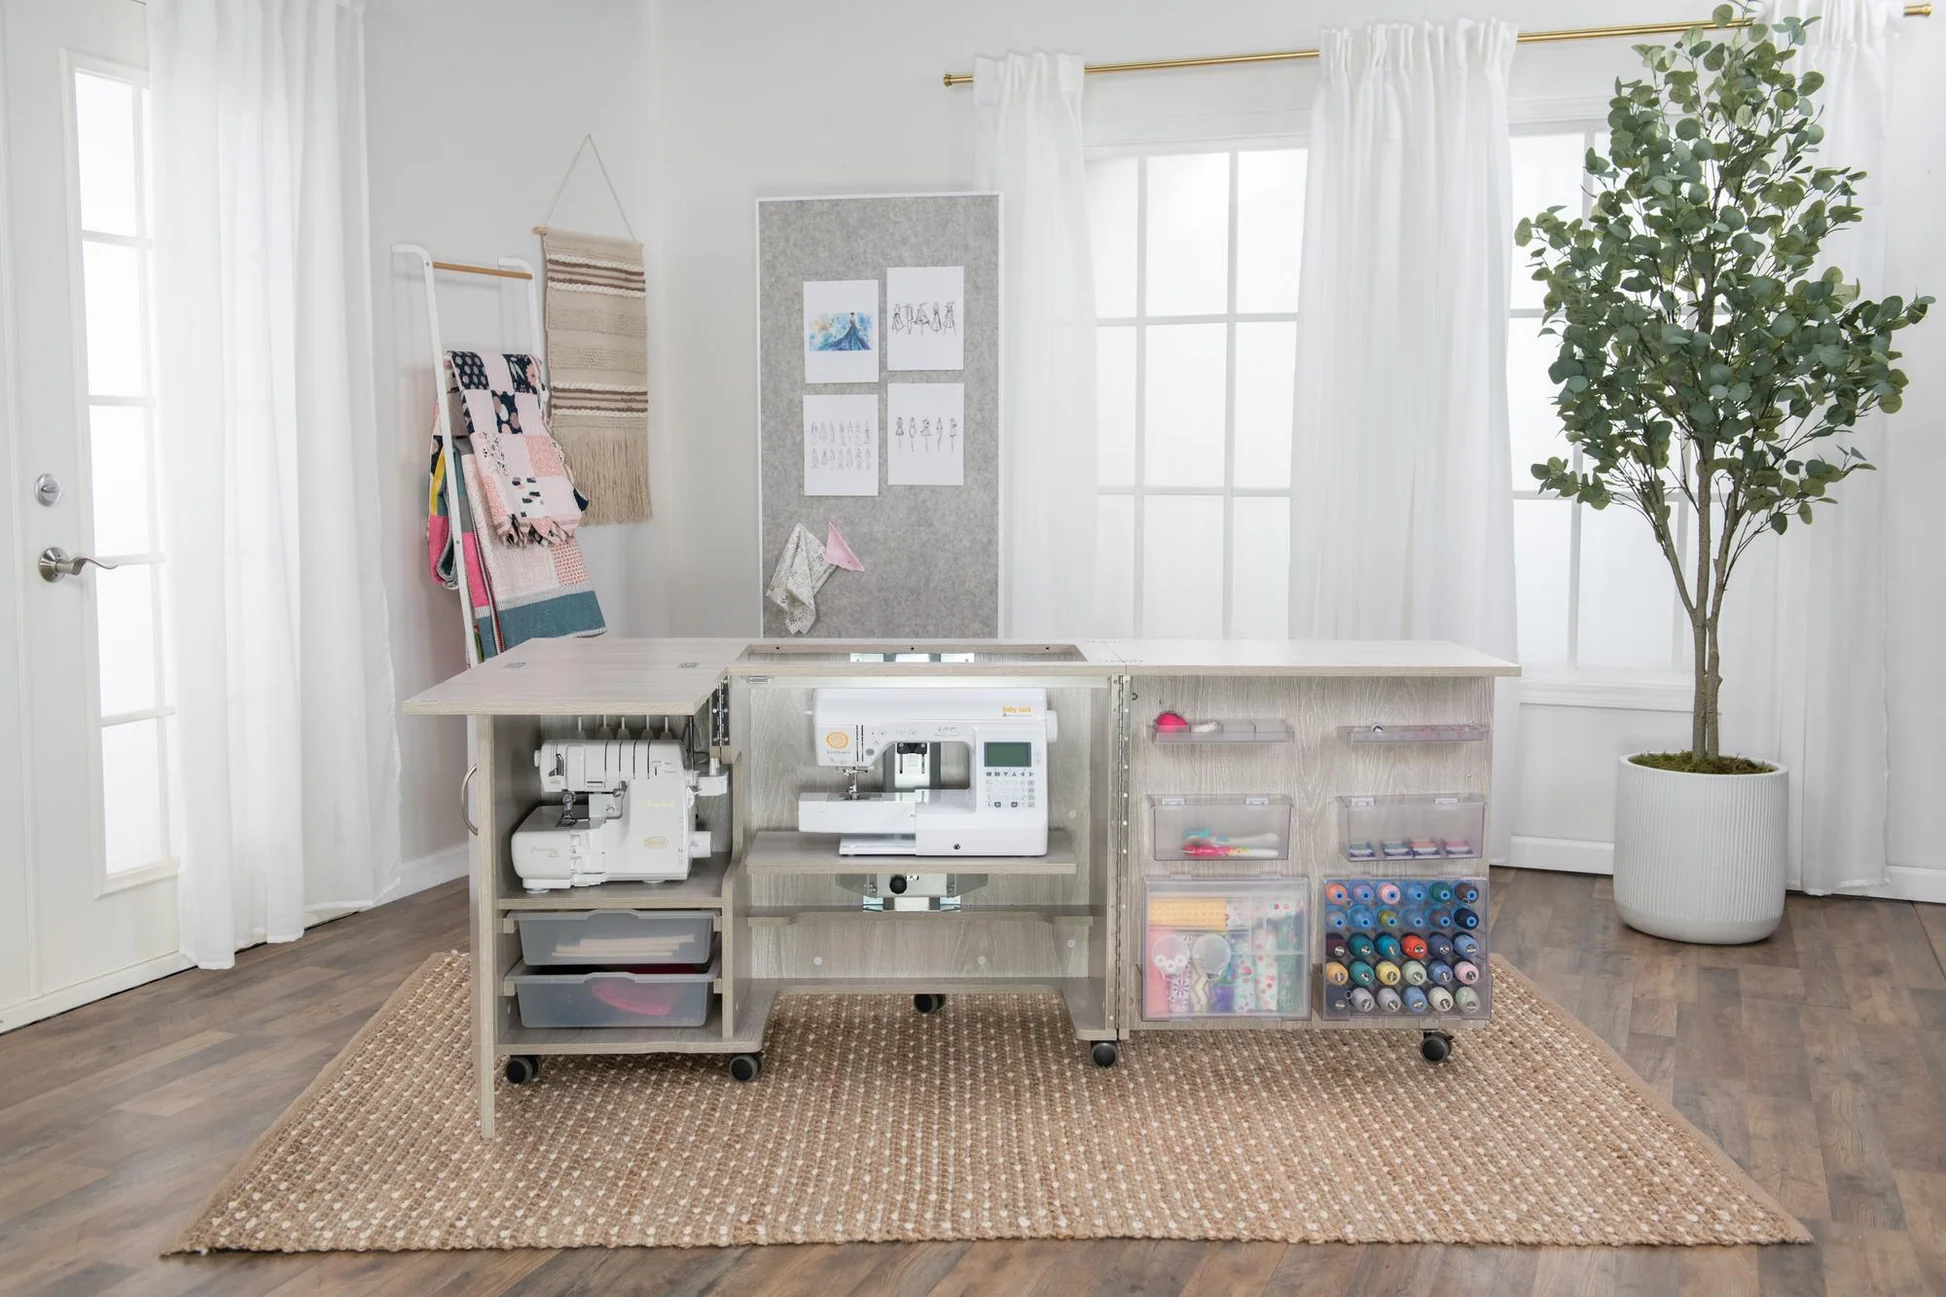
Many listings spotlight the closed dimensions because they look cute and space-saving. What you need is the largest open configuration, plus the parts that move around it.
What to measure
- Open width and depth: Measure the table fully open, including any swing-out leaves, side panels, or fold-over tops.
- Leg spread: Some fold-out tables kick their legs outward as they open, which can steal walkway space even if the tabletop looks slim.
- Drawer and door clearance: If it has a cabinet door, slide-out tray, or drawer you'll use while seated, measure the clearance needed to open it.
Quick rule from my tiny-apartment years: If the table opens toward a walkway, you're planning for the table plus the person passing by. That's where most layouts fail.
Step 2: Add chair movement
Your chair is part of the workstation. A fold-out sewing table that “fits” until you sit down is basically decorative.
The chair zone to plan
- Chair footprint: Measure the chair width and depth.
- Pull-back space: Plan at least 24 inches behind the chair so you can stand up without doing the sideways shuffle.
- Elbow room: If you cut fabric at the table, your arms need lateral space. Tight corners feel especially cramped when you're wrangling yardage.
If you're using a rolling chair, it needs even more forgiveness because you'll naturally scoot back and forth while sewing.
Step 3: Plan for fabric overhang
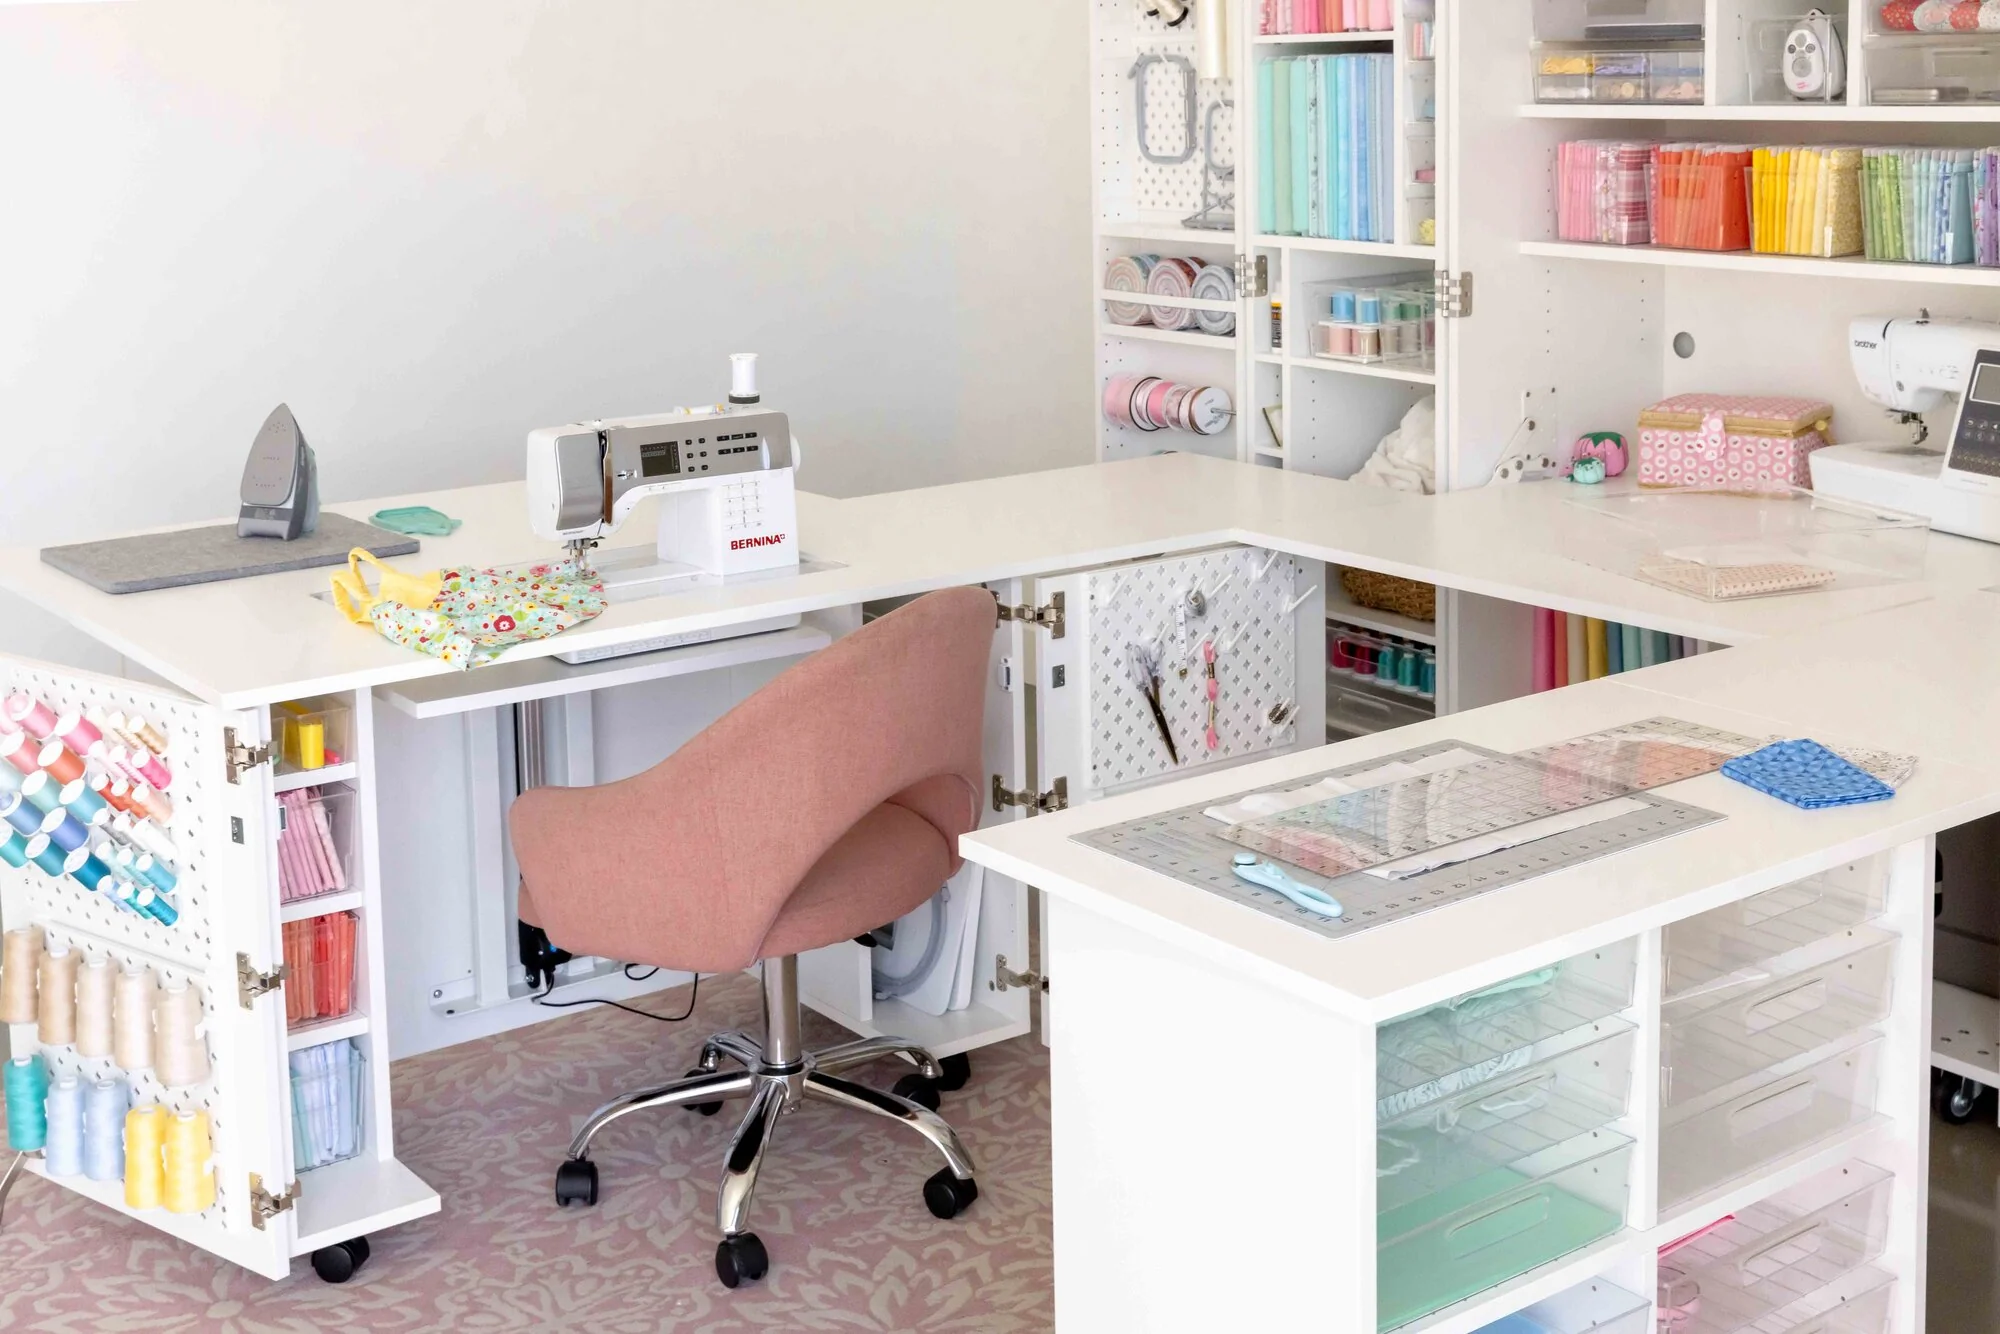
Fabric is the wild card. Your machine might fit perfectly, but the first time you work with a slippery knit or a wide piece of cotton, it drapes off the sides and instantly becomes a trip hazard and a wrinkle generator.
Three fabric tests
- Where fabric pools during sewing: A lot of people let fabric gather to the left, behind the machine, or wherever there's space, depending on handedness and setup. Make sure that spill zone isn't your main path through the room.
- Long overhang in front: If you quilt, hem curtains, or topstitch long seams, you need runway space in front of the needle.
- Cutting layout mode: Cutting often takes more space than sewing. If your table doubles as a cutting surface, you need clear perimeter space so you're not pinning fabric against a wall.
A practical trick: decide which side of the table you want fabric to spill toward, then aim that side at a safe zone like a sofa, bed, or wall, not your main traffic lane.
Step 4: Plan cords and lighting
Cords are layout bullies in small rooms. You think you'll be careful, then you stand up quickly with scissors in hand and your foot finds the pedal cable.
What to plan
- Outlet location: Measure from the table's machine position to the nearest outlet. Remember the table may open away from the wall, increasing the distance.
- Pedal placement: Your foot pedal needs a stable spot that's not in a walkway. If the table forces the pedal into the room's main path, rethink the orientation.
- Cable management: Use adhesive cable clips under the tabletop or along a table leg to keep slack off the floor. If a cord must cross a path, a flat cord cover can help. Just make sure it lies truly flush so it doesn't create a new trip edge, and don't run it across a doorway threshold.
- Task light placement: Plan where a lamp will go before you commit. Ideally it lives on the table, clips on, or sits on the wall side so the cord stays tucked away, not draped across your knees or into the walkway.
Also, check whether the table's open position blocks the outlet you need for a lamp, router, or air purifier. In small apartments, outlets are prime real estate.
Step 5: Tape it out first
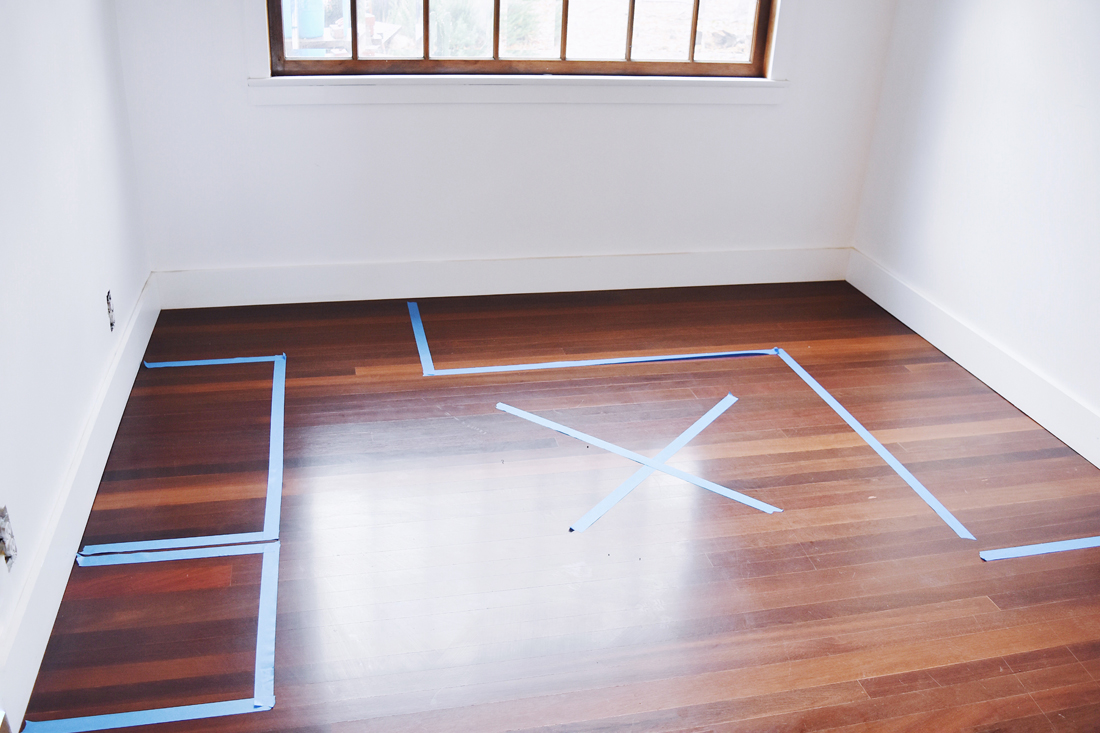
This is my favorite “Tetris master” move because it costs almost nothing and saves so much regret. Painter's tape turns your floor into a life-size preview.
How to do it
- Tape the table's open footprint based on the largest configuration.
- Add a second taped box for the chair, including pull-back space.
- Mark fabric spill zones where you expect yardage to drape.
- Mark a pressing or landing spot if you use a small ironing board, mat, or a nearby surface for a mini iron.
- Walk your normal routes: to the kitchen, to the closet, to the bathroom, to the front door.
- Test “hands full” paths: carrying laundry, groceries, or a vacuum. If you clip the taped corners, you'll clip the real table.
If you can open the table but you can't comfortably exit the room, it isn't a win. Your sewing setup shouldn't trap you inside your own apartment.
Layouts that usually work
The goal is to let the table open into dead space while keeping your main walkway open. Here are a few configurations that tend to behave well.
1) Open into a corner
Place the closed table along one wall near a corner. When it opens, it expands into the corner zone, and you sit facing into the room. This keeps your body out of the tightest spot and makes the workspace feel less claustrophobic.
2) Parallel to a sofa
If your living room doubles as your sewing room, position the table so it opens along the sofa line instead of sticking out into the middle. Perpendicular furniture creates pinch points that make rooms feel blocked.
3) Float it only with a full path
Floating a table can work, but only if you can maintain a consistent walkway. If the open setup forces you to squeeze between the table and a wall, it'll get old fast.
Clearance that feels livable
Clearance needs vary by body, room, and furniture, but these are common home-layout guidelines you can use to sanity-check your plan.
- Main walkway: Aim for about 30 to 36 inches in your primary path through the room (roughly 76 to 91 cm).
- Tight secondary pass: Around 24 inches can work for occasional passing (about 61 cm), but it'll feel snug if it's your everyday route.
- Behind a seated chair: Try for 24 inches minimum (about 61 cm), more if the chair rolls or you like to stand up straight back.
If your taped test feels like you're constantly turning sideways, that's your answer. Comfort matters because sewing is supposed to be absorbing, not a continuous obstacle course.
Pick a table that's easier to live with
If you're still shopping, a few design details tend to make fold-out tables more small-space friendly.
Look for
- Leaves that open to one side instead of two, so you can control where the expansion goes.
- Rounded corners, especially if the table opens into a path you'll sometimes use.
- Locking casters if you need to shift the station before opening it.
- Drop-leaf designs where one leaf can stay down when you're only sewing, then both open for cutting.
- A built-in landing spot for scissors, clips, and rotary cutters, even if it's just a shallow tray. If tools don't have a home, they migrate into the walkway.
A common mistake: buying the narrowest closed table, then realizing the open configuration demands the most awkward, room-blocking position. Optimize for how it lives when it's open, because that's when you're actually using it.
Mini checklist
- Do you know the table's maximum open width and depth?
- Have you added chair pull-back space?
- Have you planned a safe fabric spill zone that isn't a walkway?
- Is there a cord route that keeps cables off your main path, plus a place for a lamp?
- Do you have a landing or pressing spot so tools and heat don't end up on the floor?
- When taped out, can you still reach the door and key storage without squeezing?
If you can check these off, you're setting yourself up for a sewing station that feels like a treat, not a takeover.
FAQ
Can I put a fold-out sewing table in a hallway?
I'd only do it if the table opens away from the primary passage and you can still maintain a comfortable path to the door. Hallways are already circulation zones, so any pinch point will feel twice as annoying.
What if the table fits open, but the chair blocks the room?
That usually means the table depth is too great for the spot, or it's oriented the wrong way. Try rotating the setup so the chair backs into a low-traffic area, or switch to a slimmer chair that tucks in more tightly when you stand up.
How do I keep fabric off the floor in tight spaces?
Add a temporary side support: a small folding TV tray, a narrow cart, or even a sturdy lidded hamper next to the table on the fabric side. You're basically giving yardage a landing pad so it doesn't spill into your walkway.
Any apartment-friendly noise tips?
If your machine vibrates on a lightweight fold-out table, add a sewing machine mat or a folded rubber shelf liner under it. It helps with vibration and can make the whole setup feel steadier, especially if you're sewing late and trying to be a decent neighbor.